|
A photographic journey of discovery. How to Ethically Photograph OwlsHow to Ethically Photograph Owls By Nancy K. Crowell
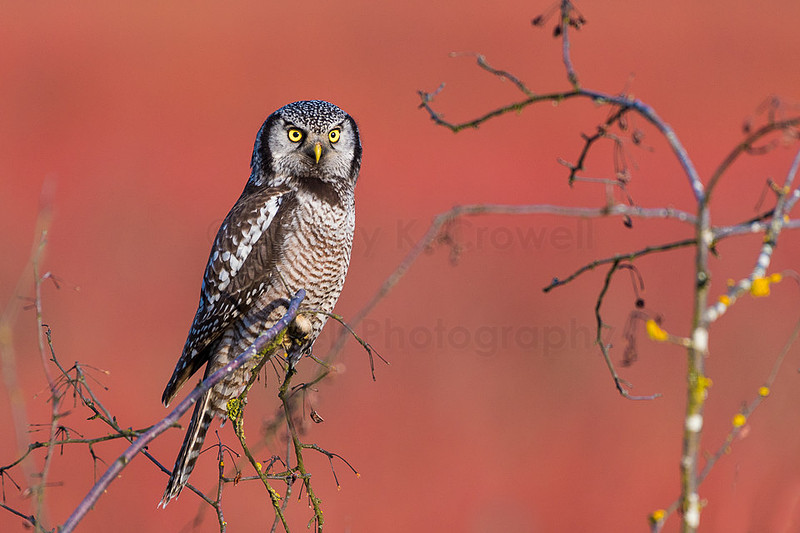
If you ask most birders new to photography, or photographers new to photographing birds, what they would most like to photograph, odds are your top response will be an owl species. I know this to be true because that was exactly how I felt when I began to learn how to photograph birds. And most of my wildlife photographer friends felt the same. But if you don’t know how to find an owl, how will you be able to photograph one? Planning and research are key to learning how to find owls, and the internet is a great place to start. Learn what species of owls are in your vicinity (if any) and educate yourself on their habitat and behavior. While it’s vitally important to approach all wildlife photography ethically, owls seem particularly vulnerable to bad outcomes when humans do not behave ethically. What do I mean by that? Ideally, you don’t want to interfere with any creature’s natural behavior. It can mean the difference between life and death for them, while it’s just a photograph to you. So, first things first, you never want to bait an owl with live or dead prey. An owl, like any creature, accustomed to receiving food from humans is compromised. It may become dependent on humans for food. It may develop risky behavior to get closer to humans that offer food, and the consequences can be deadly for the owl. Many photographers new to wildlife photography don’t realize this. I have a friend who joined a workshop to shoot snowy owl pics. She didn’t understand the implications when the workshop leader told her he would be baiting the owls. Once she understood that the cruelty of purchasing pet mice to toss out for the owl, and the dangers to the owl itself, she felt terrible about having supported this practice. Don’t make the same mistake. If you see an owl photography workshop that guarantees you great action shots, ask them directly if they will be baiting the owls. To learn more about why it’s bad to bait owls, see this story from an owl researcher.
OKAY, I WON’T BAIT THEM, BUT HOW DO I FIND THEM? Now that we’ve made our point about ethical owl photography, here are some ideas for researching where to find owls. Because people tend to overwhelm owls, most photographers know better than to ever reveal the location of their subject. In fact, many photographers who find an owl will shoot photos and not post them for weeks and even months after they take the photos, to protect the owl from crowds of photographers stressing it. With some species, ebird.com, the bird sighting list site run by the Cornell Lab of Ornithology, no longer publishes exact locations, so you may get an idea of where owls are from their species maps, but it’s unlikely you will find a map with directions on their site. There are also plenty of birding groups and forums both on Facebook and outside of Facebook. Some local birding groups will have WhatsApp chat groups or private forums where users post location information. Research groups in your area and lurk for a while to see how the users behave if you can. I would avoid groups that broadcast sensitive location information to large numbers of people. There can also be genuine conflict between birders and bird photographers. When I first started looking to shoot photos of owls, I joined my local Audubon chapter. I got to know other wildlife photographers. I talked to people known for their owl photography, and I gradually gleaned information on locations near me. But you need to know going in that if you ask someone directly where they shot an owl photo, they are unlikely to tell you, especially if you ask that question on a public forum. In my experience, one needs to prove one is trustworthy and ethical before anyone will share location information. At least that’s how it is with my wildlife photography friends. For most of us, the fun of wildlife photography can be in the search itself. It’s genuinely rewarding when you successfully locate an owl on your own. I still made mistakes when I began. I once flushed an owl as I was walking through a field because I didn’t even know what I was looking for. So, let me reiterate, learn the species you’re looking for and their behavior. Plan your behavior accordingly and above all, do your best not to interfere with the bird’s natural behavior. Once you have an idea what species are in your area and what kind of habitat they prefer, it can be very rewarding to look for owls on your own. There are clues once you know what to look – and listen – for. Owls cough up pellets of undigested prey body parts (like bones) from their gut, and these can often be found on the ground beneath trees where they roost or nearby. Other birds will make a racket if an owl is in the vicinity – often swooping down to attack the owl. And you can also look for the white markings of their poop on trees that indicate an owl is or has been sitting above. Some species, like short-eared owls, can be active during the day. Some species, like barred owls, might sit lower in trees than one would expect. Some species, like great horned owls, nest in large nests built by hawks (they don’t build their own.) Snowy owls might appear on a beach when they migrate. Do your research and learn all you can about the behavior and life of the owls you seek. If you learn better from an expert, choose a guide or naturalist who can teach you what to look for. When I became interested in raptors I took a class from a local expert – twice. It was extremely helpful in teaching me how to identify specific birds. Some people will use their phones to play a call that might bring an owl to them. This is considered a bad practice by anyone who cares about birds because hearing a call might disrupt hunting behavior or cause an owl to stress that there is competition in their territory. Just don’t do it. If you do your research and spend enough time looking in the right places, you will be successful without such aids. Play the calls when you’re at home to become familiar with the sounds, but don’t use them in the field.
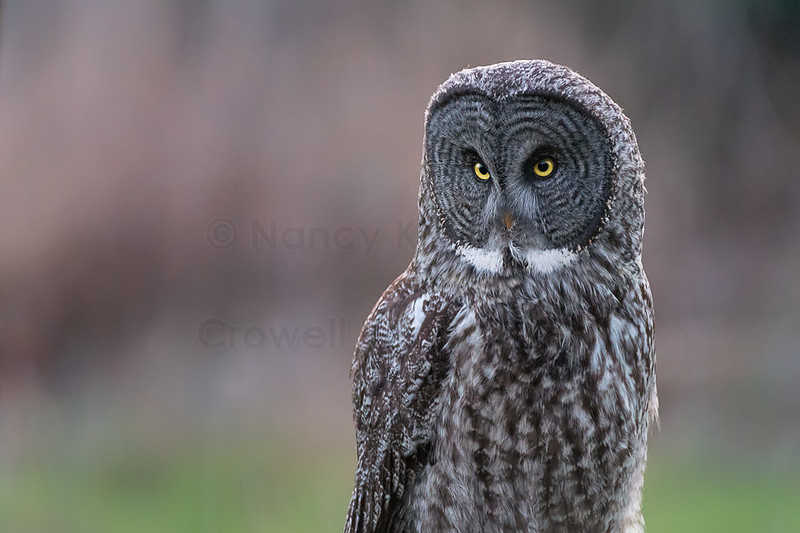
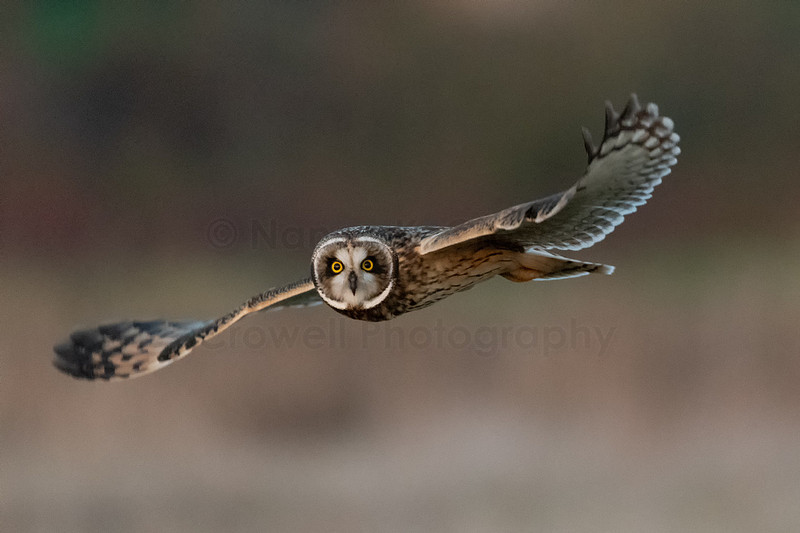
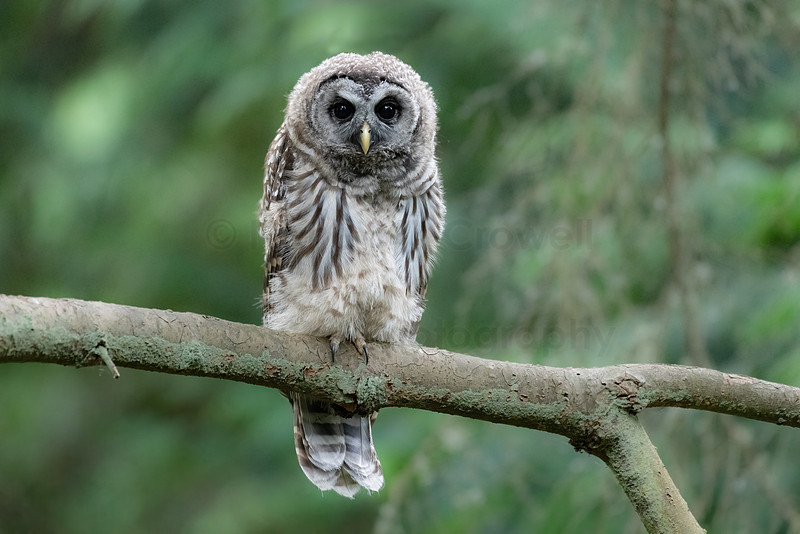
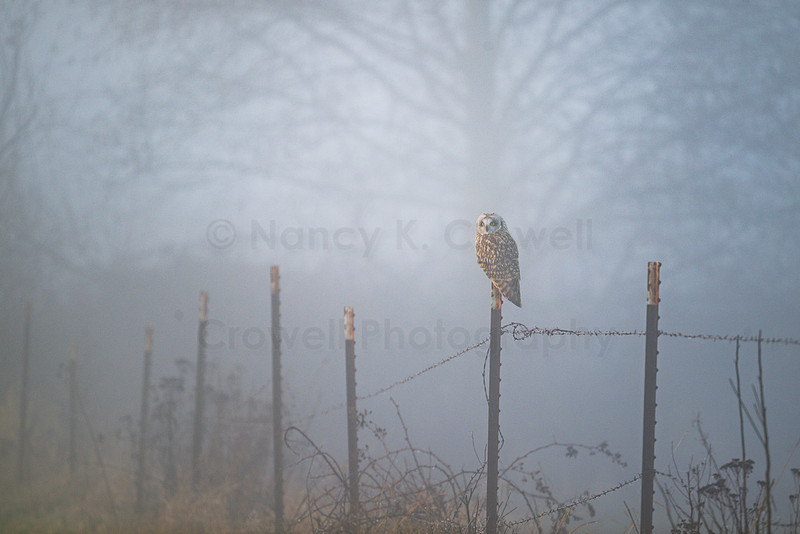
OKAY I HAVE FOUND AN OWL! BUT IT’S DARK! It’s true owls are typically most active during dawn and dusk (with some exceptions) and at night. It’s best to be prepared to shoot at higher ISO than you might normally choose, and you may want a tripod or monopod. Some owl photographers are amazing at shooting in very low light. They are often easier to find during the winter months because there is less vegetation for them to hide in. Owls can stay perfectly still for a long time, so it is possible to shoot at a slow shutter speed, although I don’t recommend it for beginning owl photography. I once shot a picture of a Great Gray Owl at 10,000 ISO and it was perfectly fine for printing, not too noisy. To avoid noisy images, expose to the right and keep checking your histogram to be sure you don’t overexpose. Since owls are often shot in low light, this method helps you retain detail in the dark areas of the image. If you have a fast lens (f/4 or f/2.8) you can get lower ISOs by opening up to that widest aperture. Keep in mind that you will also have a shallower depth of field, but because owls have disk shaped faces, this is less an issue than with birds that have long beaks. Nevertheless, focus on the eyes to get those compelling portraits. If the light is getting too dark for your camera to handle, get creative and try slow shutter speeds for flight shots. You might be surprised by the artistic results. For most birds in flight I recommend 1/2000 but I often shoot at 1/1600, 1/1250, 1/1000 or even 1/800, depending on the light or the effect. If I want a true blur I may shoot at 1/30 of a second. Experiment to see what works for you. Trying different techniques will help you create compelling images that stand out from others, especially if you’re shooting something as common as a barred owl. It goes without saying that you need a long lens. The goal is to shoot photos of the owl without disturbing it. If an owl is sleeping and you wake it up, you are disrupting its behavior. If an owl is sitting on a branch listening and looking for food and it starts to puff up and extend a wing to make itself look larger, odds are you have disrupted its hunting and it’s trying to look bigger to scare you off. If you enter an owl’s territory and it suddenly swoops at you, you have gotten too close. It’s important to pay close attention to the owl’s reaction to you. Ideally, it doesn’t react because you are far enough away to not disturb it! Even better, if you set yourself up in a blind you can observe the owls with impunity. I can’t emphasize enough how useful it is to pick a spot and simply watch. You might find that an owl is hunting in a particular pattern and time frame. Once you start to understand where and when it is flying, you can position yourself to get something special, such as a backlit shot. I know how exciting it is to just get a photo of an owl for the first time, but after that thrill has passed it’s time to be more thoughtful about the type of image you want. Owls are typically most active when the sun is low, which creates great opportunities for backlighting and side lighting.
One more technique that might help you get the shots you want is to set up your camera on a tripod and use a remote trigger to shoot while standing farther away. Whatever you can do to keep the owls safe, that should be your number one choice.
HOW MANY PICTURES DO YOU REALLY NEED? When you see your first owl there can be a temptation to stay too long in its presence. If you’re in a blind or standing quietly in one location, it might be okay to stay a while. But if you’re constantly jockeying for position to get a better, closer, shot, then odds are you are stressing the owl. I often use my car as a blind. Many birds are less disturbed by a car than by a human. This isn’t always possible if I’m out in the woods looking for an owl, so I do my best to stay very quiet and still. There are also handy portable blinds available. While everyone loves a good close-up of those compelling disc shaped owl faces, more and more photographers are stepping back and taking wider angle shots that reveal the owl in its environment. With the high megapixels available in today’s camera, you can often crop a wider shot to get the tight image you want. No matter how thrilled you are to be seeing and photographing an owl, try to keep the safety and health of the owl front and center. Embrace the experience and don’t overstay your welcome. It’s a blessing when wild creatures let us into their space and a risk to their safety. You might alert other birds to their presence. You might disrupt their hunting and make them miss a meal. There are so many ways you could unintentionally impact the life of an owl. Try to remember this when your heart is beating so fast you can barely press the shutter button. Take your pictures and move on. Don’t share the location of the owl, especially not on social media. And know that once you have seen an owl, the odds of you seeing another improve. You will learn from every encounter.
I GOT THE SHOT!!! It can be so exciting to finally get a photo of an owl that many people are compelled to immediately post their photos to social media. There’s nothing wrong with sharing one’s images, but it’s best to take a few precautions before doing so. I’ve already emphasized the importance of not sharing location information, but if you don’t strip that information from your EXIF info you might unwittingly share an exact location. I personally have GPS turned off in my cameras so that I can’t share the location info. If I want to mark a location I create a pin on Google maps. But many people do have GPS turned on by default. It’s easy to figure this out if you use Lightroom to catalog your photos. Simply open the image in Library mode and look at the metadata listed. Remove this data before you export images for social media or for use on your web site and you should be fine. As I mentioned before, as exciting as it may be to share that you have photographed an owl, if you can wait before posting it is likely better for the owl. I sometimes don’t post photos for months after I captured them. I know, I know, you really want to show people what you shot, but keep in mind that it’s just a photograph to you, but for birds that might get stressed or harassed by too many people, it can be life or death. They’re just out there trying to survive.
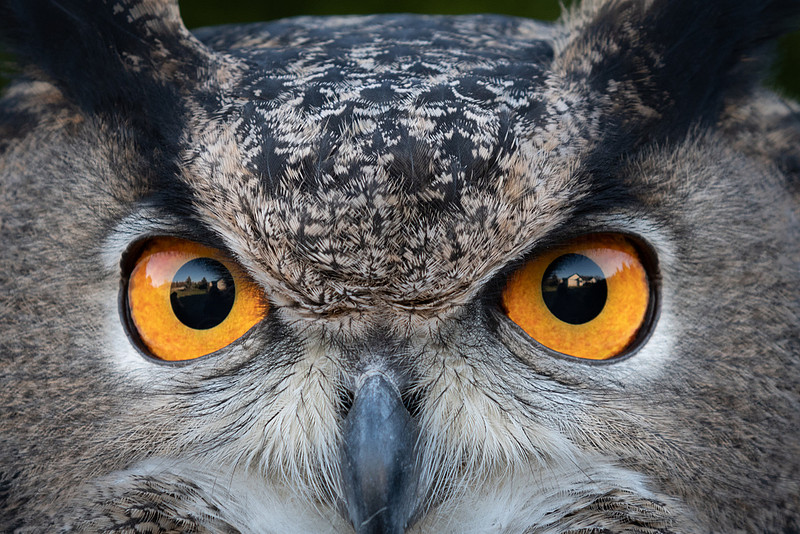
WHY OWLS ARE COMPELLING SUBJECTS Owls aren’t just compelling to photograph because their disk shaped faces and their ability to turn their heads 270 degrees. They are also an indicator species that alert us to the health of an environment. If owls are declining they are likely impacted by loss of habitat and declining food sources. They also make good ambassadors for teaching people about nature and compelling them to care. The fate of the spotted owl in the Pacific Northwest is one story that comes to mind immediately, as the logging industry and environmentalists fought a bitter battle to save this species when it became clear that logging was destroying their habitat. Although logging was stopped in many places, they are still in decline due to the emergence of barred owls, which found their way from the east coast via the corridors created by felled trees. Snowy owls are another species that come to mind as they became wildly popular thanks to the Harry Potter stories. So many children know what snowy owls simply because of this. In some places owls are considered omens of evil and death, but with the right photos and information sharing, I believe it’s possible to help people understand how important they are to our ecosystems – and to change attitudes. I love photographing owls. I hope you have luck photographing owls yourself. And I hope you see the bigger picture and how you can help keep them around by not only shooting compelling photos without harming them, but by doing your research and sharing good information along with your beautiful images.
If you prefer to skim, here’s a summary in a bullet list of all my points:
A Photographer's Guide to the Skagit Valley and SurroundsI talk a lot about this magnificent place that I live, so I know I bring it upon myself. But, this time of year I am absolutely inundated with questions from friends and acquaintances wanting my guidance on when to visit to get good photos and where to go. I am happy to help people, but I find myself copying and pasting emails and repeating myself often enough that I almost have a script. This year I decided to compile my local knowledge into an ebook guide. It has turned into a pretty detailed, 25-page .pdf, full of useful links and including a lot of sample photos. My hope is that it not only answers some very specific questions (such as when are the tulips blooming and how do I find the snow geese), but that it also gives users an overall guide regarding where to explore in this area.
I hope you find it helpful and I welcome your feedback. Click on the photo to purchase or go here. Thank you for your support!
From Observer to Activist - How Photographing Raptors Changed My PathChance Encounters When I went to a presentation on wildlife photography by Tom Mangelsen, at the invitation of a friend, I had no idea how it would change me, but if anything is testament to how photography can move a person, my experience following that class is. The short story is this - I had never heard of Tom Mangelsen. I was a photographer, but wildlife photography wasn't even on my radar. I had always supported nonprofits that work to protect wildlife, had dreamed of helping big cats in Africa when I was a kid. (I had even written to the "Born Free" folks, George and Joy Adamson, about helping them. I remember the disappointment I felt as a 12-year-old when they wrote back and suggested I donate money.) So, I had a burning interest in wildlife conservation early on, but like many childhood dreams, I had long since set it aside. So I attended Tom Mangelsen's Creative Live class in person, with my friend Kamriell Welty. At the end of his presentation he casually mentioned that he was one of the instructors in an upcoming wildlife photography workshop being offered by Photography at The Summit in Jackson Hole, WY. Kami and I discussed it and decided to go. When the time came, she was unable to go, so I went alone. That was a few years ago, and I enjoyed it so much I returned one more time to repeat the workshop. Classes are taught by some very impressive National Geographic and conservation photographers, including Michael Forsberg, who has used his photography to raise awareness about the environmental threats to the great plains. As much as anyone, Michael got me thinking about my own backyard when he gave a compelling presentation about the sandhill cranes of the Platte River in Nebraska. His clear love for the place where he grew up lent an authenticity to his presentation that was deeply moving. Seeing it through his eyes forever changed how I think about the great plains. Local Knowledge After that first workshop, I set out to learn more about our local wildlife - particularly the birds. I took a class from Bud Anderson, who is our local raptor expert, and learned that we have an extraordinary variety of raptors in our area each winter. Through his deep knowledge and his own passion for birds, Bud has moved many a person to become involved in raptor research and observation. I have also repeated that class. I started taking more bird photos.
I got to know a few amazing wildlife/bird photographers. I took more photos. I started getting attached to the birds I was photographing and worrying about their survival. It's hard to be a detached observer when one is privy to intimate moments in a creature's life. I learned that one of the greatest threats to raptors is the widespread use of anticoagulant rodenticides, which impact not only raptors but other wildlife that feed on rodents - even cougars - and kills them. It's a hideous way to die - slowly bleeding internally. I learned this because one of my friends lost an entire family of barn owls due to eating poisoned rodents. Everybody Loves Owls Since I started taking photos, friends who are lifelong birders have begun reaching out to me - sharing locations of birds they would like to see photographed. There's an amazing network of people who share a passion for birds and I am grateful to have so many patient teachers. I am still not good at identifying birds. I have so much to learn. This year I was invited to photograph a great horned owl nest in a friend's yard. When I first visited the mom was just sitting on the nest. Within a few weeks there were little fuzzballs poking their heads up. I went by every few days to watch and photograph. At some point, after they had hatched, the father stopped appearing, which left all the feeding to mom. There were three owlets. One fell out of the tree, as is common, and hopped away. We never saw it return. We don't know what happened to that owlet, but the nest was in a neighborhood that borders rural housing and fields - places where people often use rodenticides. I shared photos of the owlets and their story as it unfolded. People seem to universally love owls. My baby owlets had fans-people who wanted updates. It occurred to me if I could share what I have learned about the way humans endanger their lives, maybe, just maybe I could make a small difference. Missing Piece of the Puzzle I am a purpose-driven person. I really want to contribute to the greater good. I always have. When I read that California had recently passed a bill banning anticoagulant rodenticides this year (it's not yet a law), I started asking around to find out if anyone was working on this in Washington state. What I learned is that a lot of people are gathering data - doing necropsies and collecting information on how many of our raptors are killed by rodenticides, or have them in their systems. But no one has made a serious effort to get the law changed. What could I do? I'm just one person. My friend Melissa Groo, who gently and persistently uses her photography to advocate for wildlife, directed me to the people behind the California bill - Raptors Are The Solution a.k.a "R.A.T.S.". When I talked to Lisa Owens-Viani, the co-founder of R.A.T.S., she told me they had been wanting to open a Washington chapter. And that's where we are today. I am wading in to unfamiliar territory with my eyes wide open. I believe with enough support, we can make a change, but I am not naive enough to think that I can do it alone, or that it will happen overnight. I am not a National Geographic nature photographer. I am a writer and former magazine editor, but I have never written about wildlife. I don't have a biology degree. I'm just a person who loves where she lives and would like to protect our existing wildlife. I am reaching out to all the people I know who have been working for so long to help raptors in our state survive. Through the main organization in Berkeley, CA, I have access to excellent educational materials to distribute. I know there is a long road ahead, but I'm willing to follow it. If I can stop one person from using anticoagulant rodenticides, that person may stop another. I have created a Facebook page for people to connect with us, so please go like our page. I will post updates to the page as the story unfolds. For now, I am just starting to work on awareness and education. It takes a long time to create change, and I know that. But I think people fall into two camps - those who wring their hands in frustration, and those who step up and try to do something. I land in the second camp. I hope you will join me. Good Bye 2018!Happy New Year! Goals & Aspirations I don't know about you, but I am frankly shocked that I'm sitting here on New Year's Eve - already. I do like to look back on the past year and set goals for the upcoming year. I always write a letter to myself for the next year and then open it on New Year's Day. Fun to see what made the cut and what I didn't succeed at - and decide if the things I didn't get done are worth putting on the list for next year. I've had a trip to Alaska on my list for a few years now. I think 2019 might be the year that happens. I'm itching to see that landscape and possibly some of the wildlife. In 2018 I connected with three other women who are avid wildlife photographers. We have bonded through photography and are planning some excursions this year. The burrowing owl photos in the image below (third on right of top row) are a direct result of having made those connections. The fox image is also a result of knowing these women. I'm excited to add at least one trip with them to my goals for next year. I will share more about that in another blog entry. Insta-analysis Most photographers I know are on Instagram these days - it's an endless source of inspiration and discovery for me. I love having a jewel case of new images to pore over and enjoy. And it's interesting to see what photos I posted were deemed 'most popular' this past year. In Instagram terms, that means they got the most 'likes' from people who follow me. In the grand scheme of things, that doesn't mean much, but looking over the top nine does indicate a pretty clear pattern. Tulips and owls. And oh yeah, a fox kit.
In many ways, I'm not surprised these images hit my top nine. They are mostly flashy and make for good eye candy on Instagram, where people scroll by on their phones. I am surprised, though, that the first image in this group landed here. It's a picture of my first poster, published by Third & Wall. I'm excited to have a poster out there in retail-world and it seems my followers were excited for me. Personal Successes But this isn't how I judge my most successful images for the year. Yes, the owl pictures were a triumph for me - I love waiting and watching and hoping to catch an action shot. The fox kits were pure joy to watch and photograph and I was thrilled to add them to my wildlife files. But this year I also had the chance to photograph a part of the world I never expected to get to - Costa Rica - thanks to a dear friend who took me there. Hiking through the jungle and happening upon birds, monkeys, anteaters, tapirs. . . it was truly a thrilling experience for me. The photos I made in Costa Rica won't win any wildlife photography awards, but they hold precious memories for me. I learned a lot - macaws are incredibly fast and difficult to shoot when flying - and I know what I can do better, thanks to all that practice trying to capture images of tropical birds. If I'm learning and I happen to get a few images I like, I'm happy. Another, more important measure, of my year in photography is what images compelled people to order prints. Some of them surprised me, some of them are among my personal favorites, so I was very happy to know other people liked them enough to want them hanging on their walls. Here's a sampling of my top-selling images from 2018:
I am grateful for everyone who purchased my cards, calendars and prints this year. Your support enables and encourages me to continue to push myself and perfect my work. If you saw an image this year that you thought about purchasing, but never got around to it, I'm offering a 10% discount on ALL purchases from this web site through the end of February. Just create an account and place your order through this site. I will apply the discount at the time I review the order. I plan to retire images from this site later in the year, but I will let you know before I remove anything. In the meantime, I hope your New Year brings you everything you wish for. And thank you for following me. I will continue to post pictures on Facebook and Instagram throughout the year.
Costa Rica - A Photographer's First VisitLast year a dear friend of mine returned from his first trip to Costa Rica raving about the beauty of the place and insisting I needed to go take photos. I dismissed it as a pipe dream, but this year he made sure it happened by giving me his Alaska Airlines companion ticket and scheduling an itinerary in which he acted as guide and driver and part-time camera Sherpa. I have just returned from that trip and I have a few things to share with photographers and would-be photographers who are planning a visit. GEAR UP OR DOWN First, camera gear. Do your research and carefully assess what you might need to capture the photos you think you are going to get. I did a lot of research before I went. I read a lot of blogs, watched some YouTube videos and even befriended some Costa Rican photographers on Instagram so I could ask advice. In the end, I bought a ThinkTank International travel bag to carry my gear. Here's what I took: two camera bodies, Nikon D500 & D750. Four lenses: Nikkor 200-500mm zoom, Nikkor 24-70 zoom, Nikkor 105mm macro and Nikkor 50mm f/4. I also took a 1.4 extender, which I did not use. I had multiple backup batteries and two battery chargers so I could recharge spent batteries at night. I also took multiple backup memory cards, a Surface Pro laptop and two external hard drives. Usually when I travel I transfer my files each night to an external hard drive and clean my cards. In this case I ran into a road block. I had purchased a La Cie Rugged 2 TB external hard drive just before I left, but discovered on my first night there that it is not compatible with the Surface Pro. My travel companion works in IT and even he could not get it to work with the Surface Pro, so I changed course and simply watched how full my cards were getting. I didn't download anything till I got home. Other essentials I took included two water-proof sleeves for the cameras, plenty of lens cleaning cloths, my rocket blower and brush, and a set of tools. I did not take a tripod. I knew we would be hiking through the jungle in the heat and I knew I was going to be suffering as it was. A tripod would have added to my misery and slowed me down. I also chatted with a local photographer who suggested a tripod wouldn't be necessary. THE MISTAKES I MADE I think I did a pretty good job of selecting gear. Although the 200-500mm lens is heavier than my 80-400, I survived. It enabled me to get better pics of the monkeys we saw, and some of the birds, than a shorter lens would. I took this lens virtually everywhere with me. Mounted on the D500, which is a DX format, it gave me good reach for almost all birds and critters and in some instances was too much. I did not need the 1.4 extender. I only used the macro lens a couple of times, but since we went in the dry season not much was blooming. If I had gotten to see the poison dart frogs I might have used it more. I used the 50mm the first night we were there for some 'street' photography. I wish I had done that more. I was usually so dialed in to trying to capture good bird images that I let that slide. I love the 50mm and it's a great walking around lens. If you have one, I recommend you take it and use it. I have an 80-400mm lens and that would have worked great for most photos, but if I added the 1.4 extender for more length it would have put me at a maximum of f/8, which is way too slow and dark for the harsh light and shadows of the jungle. Some of the information I read highly recommended purchasing a Better Beamer light diffuser for flash. It seems a lot of bird photographers use this. I looked into it, but in the end decided against it. I don't normally use flash, so I would have had to purchase a flash as well as the Better Beamer and then practice with it. Instead I took a headlamp and flashlights. When we did night tours the guides had strong enough flashlights that it was relatively easy to take photos anyway. I would skip the extra gear in this case, unless it's something you're accustomed to using. I also took a small day backpack. Each day I would decide what I needed and only took that gear. We traveled by boat to Sirena Station in Corcavado National Park. I had planned carefully for protecting my gear from rain, but failed to consider the potential damage of salt water spray! Although I took a large garbage bag with me, I forgot to take it on the open boat. I sat in the middle and kept my gear in a backpack, but was definitely worried when the water sprayed over the bow numerous times. Next time I will take some sort of water-proof backpack or remember that garbage bag! After we returned from that trip I wiped down all my gear with a damp cloth and let it stay in the air conditioning for a while to dry out. It seems no worse for the wear.
THE BEST ADVICE I FOUND I watched so many documentaries and videos about Costa Rica, trying to imagine what the conditions would be like and how I would have to adapt. In the end the very best advice I gleaned was a single, casual tip. Many posts suggested investing in silicone bags to keep gear dry. The tip that made the most sense to me was this: if you're staying in an air conditioned place, keep your camera gear in the bathroom. Why? The bathrooms usually aren't air conditioned, so your gear won't be exposed to dramatic temperature fluctuations. When you take it out in the morning, it won't fog up in the heat and humidity. It works. My companion didn't do this and it took a good 15 minutes for his camera to adjust on the first day. I would have missed shots if I had been waiting for my gear to acclimate! OUR ROUTE We decided on February because it is the middle of the dry season. It's easier to get around during dry season, plus it's easier to see animals and birds because the foliage isn't as dense. Also, traveling to the remote Osa Penninsula is particularly challenging during wet season. I used a OneNote notebook to track our itinerary and keep detailed photography notes, but we used TripIt to keep us organized. Our route was determined by my traveling companion's prior experience and the location of some friends I have who moved to Costa Rica a decade ago. I had never gotten to visit them, so we planned time to visit their remote location. It happens to be on the Osa Penninsula, near Corcavado National Park, so we knew it was a place we wanted to visit anyway. I knew I wanted to see hummingbirds, the resplendent quetzel, and macaws. Everything beyond that would be a bonus.
REMAINING FLEXIBLE We planned our route based on things we wanted to see and do, and allowing for travel time and "course corrections." We really didn't know what the roads would be like, so we built in a little extra time to change course if we needed to and we used Booking.com to reserve rooms that could be canceled without forfeiting a deposit. Some of our plans worked out, some didn't. I won't go through an exhaustive day-by-day description here, but I will highlight some things to think about if you're planning your first trip to Costa Rica. LIBERIA & PLAYAS DEL COCO What worked: We flew into Liberia, rather than San Jose, because it's a smaller airport and we thought it would be easy to get to the coast for an overnight before starting our journey to Monteverde. If you're planning to go to the Osa Penninsula first, San Jose is a better choice. Our decision to rent a car and drive directly to the coast for our first night worked out well for us. We stayed at Hotel M&M Beach House in Playas Del Coco. Inexpensive, clean, private, guarded parking - it was all we needed. We arrived in time to get a light dinner, a good night's rest, and wake up early enough to enjoy the beach before hitting the road for a long drive to Monteverde. Beacause we had scheduled plenty of time, we actually booked a boat tour in the Paolo Verde park for our first day. Although we had booked a 10 a.m. tour, we arrived early and Palo Verde Boat Tours accommodated us - we got out on the water around 9:00 a.m. After a wonderful, personalized tour (the only other visitors were a biologist who spoke excellent English and served as an unexpectedly great guide, and his family), we had a fabulous lunch. Highly recommend this tour company if you're in the area. We saw at least 17 different birds, plus bats, crocodiles and iguanas. And when the boat driver saw my long lens, he urged me to sit in the bow of the boat - which proved perfect for photos. What didn't work: We arrived on a Saturday afternoon. Apparently this is a really popular arrival time and we were stuck in the customs line for over an hour. Pick another day to fly in and you might not have to wait as long.
MONTEVERDE CLOUD FOREST What worked: Wow. The roads in Costa Rica are REALLY BAD. I have never seen such bad roads. Still, since we rented a four-wheel drive SUV, we were able to drive all the way to Monteverde, albeit s l o w l y in some cases. We picked a hotel "Tobi's Place", closest to the Cloud Forest. Having the car was a good idea, as although people suggested we could walk to the entrance of the Cloud Forest Reserve, we would have been exhausted before we even got there if we had walked carrying our gear! We got up early, drove up and parked just outside the entrance. Although we hadn't hired a guide beforehand, there were plenty of guides available for hire when we purchased our entry tickets. I can't emphasize this enough: HIRE A GUIDE! You will miss all sorts of things if you don't hire a guide the first time you walk through the Cloud Forest. We took the tour with a guide, then took a break at the nearby hummingbird garden, then went back and walked on our own. The guide will give you history and help you see things you would no doubt miss if you were just wandering through on your own. We picked up a local hitchhiker on our way down from the Cloud Forest. He turned out to be not only a certified guide, but also a bird nerd and bird photographer. He also knew a lot about amphibians and reptiles. We ended up hiring him for a private night tour. I'm not sure I would have picked up a hitchhiker if I had been on my own, but I was sure glad to make this connection! We had a blast with Jean and now we're 'virtual' friends on Facebook and Instagram. If I ever get to return, I will hire him as a bird guide. What didn't work: I really wanted a great photo of the resplendent quetzel. Although I saw it in the Cloud Forest, I learned later that they are actually more visible in one of the local private reserves. Do a little research if there's something special you want to photograph and give yourself the best chance to capture that image. I also wanted great hummingbird pictures. As it turned out, the best place to see the hummingbirds was at the hummingbird garden right next to the park entrance. They have tons of feeders and the hummingbird action is phenomenal. Although I got a few photos, I didn't allow enough time to get what I wanted. I could spend a whole day there watching and shooting pictures. Personally, I would allow more time for that if I went back. I also would consider taking a shorter lens. My 200-500mm was too long for this location. My macro wasn't quite right. I think my 80-400 would have worked better. DRAKE BAY What worked: We had no idea if we could actually drive to Drake Bay. Fortunately, the rental car company suggested we use the WAZE app. This worked beautifully everywhere we were. We also opted for the personal Wi-Fi hotspot when we rented the car. This portable Wi-Fi helped us out more than once during the trip. You can drive to Sierpe and take a boat to Drake Bay. We both decided that next time we would either do that or fly to Drake Bay. Although the drive was exciting (we had to drive through SIX rivers to get there!), it took more time than we would have liked due to the condition of the roads. When our first hotel turned out to be undoable, we got on Wi-Fi and searched for another. We found a cheap, clean, convenient place called Casa Toucan. It had parking next to the room (perfect if you have lots of photo gear, as I did), air conditioning (an unexpected bonus) and a small refrigerator in the room. Plus, after a little negotiation for four nights, it was only $50 a night. Would I stay there again? Probably not. The shower barely worked. The family that lived there was really noisy at night when we wanted to sleep. There was no breakfast or even coffee. There was no view. BUT, all that said, the family was very nice. We didn't spend that much time in our room, and because we were budget traveling, it worked for us. When our scheduled tour to Corcavado National Park fell through we scrambled to reschedule. We found a friend in Eric at Pacheco Tours who put up with our bugging him almost hourly and scheduled us for a tour. We would probably stay at their cottages next time, as they were reasonably priced and had an ocean view. One of the tours my friends had insisted I book in advance was The Night Bug Tour with Tracie the Bug Lady. Oh boy was it worth it! Smart, funny, informed - Tracie and her partner Gian do a fantastic job of showing you the jungle you don't know is there. Highly recommend! Five stars! And here's something that surprised me - although we were well prepared to fend off mosquitoes, there were none! That's right. NO MOSQUITOES. I asked my friend who lives there about this and she told me there are a few during rainy season, but generally, it's not bad.
What didn't work: Ah, so many things went wrong in Drake Bay. We had booked a hotel (Lookout Drake Bay) through Booking.com. The room we booked looked lovely and had ceiling fans, which we thought would be good enough. When we arrived, the driveway to the hotel was nearly impossible to use. We barely made it up with our four-wheel drive! Then, there was a very long, steep walk up the hill. When the proprietor showed us the room it was nothing like the room we had viewed and booked on Booking.com. Instead, it was a small, fan-less room with a bunk bed. We said no thank you and went down to the town to get on Wi-Fi and find a new place. We were very worried (at least I was - my travel companion is pretty calm through things like this), that everything would be booked. (See the resolution above in "What Worked). I had also made a point of booking our tours for Drake Bay based on recommendations from my friends who live there. They highly recommended I book the guide Roy through Drake Divers to go to Sirena Station in Corcavado National Park. I did that in September. Everything was confirmed. When I sent an email the day before our arrival to reconfirm I received a casual response telling me Roy wasn't available due to family illness. They said they would book another tour for me if I wanted. Of course I said yes, then got no response. Frankly, they dropped the ball. We spent our first day in Drake Bay walking from tour company to tour company trying to book a tour to Sirena Station because the National Park only allows a handful of people into the park every day. When we went to Drake Divers we were received with indifference. I showed the emails and the woman working there kind of shrugged her shoulders and said Roy lived in San Jose and they couldn't reach him. It was at this point I really lost it. This was on Wednesday and we had scheduled our trip for Friday, but told them we were flexible enough to go the next day. I even texted my friend who lives there, who called and talked to them. Long story short, long after we had found and booked another tour, they sent an email saying we could go with Roy the next day. It was after six in the evening and we were headed to a night tour. Needless to say, I would never try to book a tour with these people again. They get great reviews on Trip Advisor, but they dropped the ball for us. Gear: If I were planning for the night bug tour, I wouldn't take my camera. I would take my phone only. I had hoped to see poison dart frogs, but they're actually in Sierpe, not Osa (see note above about doing your research!). I had hoped to get some good pics with my macro lens, but it turned out to be too difficult to get close enough and Tracie and Gian are very conscious of not casting light on the creatures they show you for too long. A phone with a decent camera is plenty good enough for the night tour. For the trip to Sirena Station I took my Nikon D500 and 200-500mm lens. It was a good combo for most things I shot, but was admittedly a heavy load for me to carry in the heat. If I had a nice slush fund, I would probably have gotten the Nikkor 300mm f/4 and used my 1.4 extender. This would have given me the same distance with less weight, although less flexibility than the zoom. THE LAST NIGHT We decided the drive from Drake Bay back to Liberia was likely to be one we didn't want to do in one day, so we scheduled our last night to stay at Cerro Lodge in Tarcoles. Imagine my delight when I saw that they have bird feeders that attract scarlet macaws as well as dozens of other colorful birds! My only regret was that we didn't spend at least two nights here. If you want a lazy-man's way to see gorgeous birds (even a ferruginous pygmy owl!), this is a great location off the beaten path. The rooms are nice, the food is great, there is a pool, and the bird watching is top notch. WHAT I WOULD DO DIFFERENTLY I felt pretty good about my planning. Although I didn't use the D750 and my wider lenses as often as I would have liked, I was happy to have gotten some decent photos for my first trip out. Now that I have an idea what to expect, I would spend a little more time in Monteverde and visit a couple of the nearby nature Reserves in addition to the Park. I would consider getting a little lens for my iPhone and use it for some more 'touristy' casual photos. Clothes wise I did great. In fact, my clothes bag was much smaller than my camera bag. I took one pair of Keens and one pair of Teva sandals. I wore the Keens the entire time, except for the trip to Sirena station. For that I wore the Tevas simply to get in and out of the boat (which is a beach landing). Otherwise it was all tee shirts and shorts. For travel from the cold Pacific Northwest I wore a Nuu-Muu dress which I was able to layer with tights over shorts (I took off the tights when we landed), and a long-sleeved overshirt (which I removed upon landing). I also took and wore a fantastic lightweight vest by ScotteVest. This being my first trip to Costa Rica, I naturally had visions of getting photos of every single thing - from monkeys to birds to poison dart frogs. I also knew that probably wouldn't happen. Next time I would schedule time to visit Sierpe Frogs and get photos of the famous and beautiful poisonous amphibians. QUICK TIPS
SOME PICS - HOVER TO READ CAPTIONS
« Older Posts
©Nancy K. Crowell, all rights reserved, Crowell Photography, LLC
|